Tuesday, June 29, 2010

Tasty Taco Salad


:) I love taco salad because its EASY, can feed large groups and is fabulously fresh. For those out there familiar with TVP (textured vegetable protein), I used this in place of the ground beef. I added a can of chilies, some tomatoes and beans. Yum :) This dish is so versatile. You can throw whatever 'Mexican-like' food items on there that ya want.

Tasty Taco Salad

INGREDIENTS:

1 lb ground beef.
2-3 C beans (kidney, pinto, black etc)
1 TBS taco seasoning
½ C water

Toppings:
fresh onion, diced
lettuce, shredded
tomato, chopped
green pepper, diced
olives, sliced
cheddar cheese, grated
tortilla chips or Fritos, broken in bite sized pieces

Dressing:
½ C mayonnaise
¼ C ketchup
1TBS sweet pickle relish

DIRECTIONS:

1. Fry and drain ground beef.

2. Add beans, taco seasoning and ½ C water. Bring to a boil, then simmer for a couple of minutes.

3. Prepare toppings. Line plate with chips.

4. Add toppings are desired with dressing on top. Enjoy!

Photo Source: Kraft

Saturday, June 26, 2010

Banana Bread with Streusel-Nut Topping

There was a bake sale going on in my city today and I was wracking my brain trying to come up with something that people would want to buy. People want to buy what looks good. Hmmm....what can I make that looks AND tastes good?? I'm not good at decorating with frosting, so cupcakes or frosted cookies were out. I then thought to make this yummy banana bread with streusel topping. I'll be honest-I NEVER make sweet breads according to recipe. Usually I substitute whole wheat flour and cut the sugar and oil. After all, I don't want to feel high as a kite after breakfast (which by the way, if you do eat sweet breads for breakfast, you might as well have a piece of cake-same thing without the frosting!!) Anyway, I made this recipe just as it said-after all, I wanted it to sell! haha. I LOVED how it turned out. I will use this recipe again if I'm ever hosting a baby shower or something like that. I sliced the pieces thick and with the steusel topping, it looked incredible!
I used a regular bread pan and look how high the bread got! It would have been bad news had I used a narrow and smaller loaf pan. I'm pretty sure it would have overflowed for sure.
Banana Bread with Streusel-Nut Topping
Source: Better Homes & Gardens New Cook Book

2 C all purpose flour
1 1/2 tsp baking powder
1/2 tsp baking soda
1/4 tsp ground cinnamon (I used 1/2 tsp)
1/8 tsp ground nutmeg (I used 1/4 tsp)
1/4 tsp salt
2 beaten eggs
1 1/2 C mashed bananas (5 medium)
1 C sugar
1/2 C cooking oil or melted butter or margarine
1/4 C chopped walnuts (I didn't add these)
1 recipe Streusel-Nut Topping (optional)
1. Grease bottom and 1/2 inch up the sides of one 9x5x3 or two 7 1/2 x3 1/2 x 2 inch loaf pans; set aside. Combine flour, baking powder, baking soda, cinnamon, nutmeg and salt. Make a well in the center of flour mixture; set aside.
2. In a medium bowl combine eggs, bananas, sugar and oil. Add egg mixture all at once to flour mixture. Stir just until moistened, batter should be lumpy. Fold in nuts. Spoon batter into prepared pan(s). If desired, sprinkle Streusel-Nut Topping over batter.
3. Bake in a 350 degree oven for 55-60 minutes for a 9x5x3 inch pan, or 40-45 minutes for 7 1/2 x 3 1/2 x 2 inch pan, or until a wooden toothpick comes out clean (if necessary, cover loosely with foil the last 15 minutes of baking to prevent overbrowning. Cool in pan on a wire rack for ten minutes. Remove from pan. Cool completely on a wire rack. Wrap and store overnight before slicing. (Make sure you check the bread and that the toothpick comes out clean. Nothing worse and cutting into bread and realizing its not cooked all the way!! I'm pretty sure mine had to cook at least 20 minutes over the stated 60 minutes cooking time, so be prepared to check the bread often and to let it cook longer if needed. If it would have needed any more cooking time, I would have had to cover the top with foil to prevent it from burning).
Streusel-Nut Topping
In a small bowl, combine 1/4 C packed brown sugar and 3 TBS all-purpose flour. Using a pastry blender, cut in 2 TBS room-temperature butter until mixture resembles coarse crumbs. Stir in 1/3 C chopped walnuts. *I didn't have a pastry blender so I just used 2 knives to cut the butter in. When I got tired of that, I used my fingers to mix the rest of the way. :)

Friday, June 25, 2010

Authentic Mexican Tortillas


About two months ago, a woman in our ward offered to teach whoever wanted to learn how to make homemade tortillas. Now, I have tried making tortillas SEVERAL times over the past few years. I had tried several homemade recipes all of which ended up thick, gross and nasty. Then I tried making tortillas from a mix I got at the store-another HUGE failure. Oh well, I'm not Mexican and I had to come to terms with the fact that Cafe Rio was the only way I would ever eat simply delicious tortillas. I had to face that I couldn't make homemade tortillas-period.....until NOW! These are simple to make and taste great. They are a lot like the uncooked ones you can buy at Costco or Walmart, but there are zero preservatives in it and come out so fresh. So, I'm here to say: IT CAN BE DONE!


Homemade Tortillas
by Tonya L.

Makes 8 tortillas
Ingredients:
2 cups white all-purpose flour*
1 teaspoon salt
¾ teaspoon baking powder
1/3 cup shortening
¾ cup warm water


Directions:

Combine flour, salt and baking powder in a large bowl. Cut in shortening. Stir in water, mixing with fork until dough leaves sides of bowl and a ball forms. Turn out on to floured surface, sprinkle with flour, knead 10-11 times. Cover and let rest for 15 minutes. Pinch off section of dough little bigger than a golf ball. Pat or slap into circle shape. Roll out into thin tortillas, use plenty of flour so dough doesn’t stick or tear. (Plenty of flour is the key to making the tortillas thin enough). Cook on a dry griddle, heavy cast iron skillet, or Teflon pan. Cook just until bubbles appear, flip once. Keep cooked tortillas warm and soft by covering them with a clean kitchen towel until ready to serve.

Thursday, June 24, 2010

Tuna Gravy on Toast


So, I know what you are thinking. "What??!! Tuna Gravy on Toast?? Weird." Trust me, I thought it was so weird too.....until I actually tried it. It is so good! Simple, but good :) And I stole the picture above from the site I got this recipe from. My tuna gravy is darker because I use whole wheat flour in it and also whole wheat bread, but you get the idea.


This is something I've also picked up on the first few years I was married: There are a few meals I've learned that my husband LOVES. Those meals include grilled cheese with tomato soup along with this tuna creation. I've learned that the meals he loves are the ones his mom used to make for him....which generally are pretty simple-so I'm thrilled about this :) I first had this dish at my in-laws for breakfast, but we had it for dinner. So, I don't know what you should serve it as but it was yummy as both.


Tuna Gravy On Toast

Source:


*Note: I halve the following recipe and it works out perfect for 2 people, plus some leftovers.


4 cans tuna, drained
1/2 Cup butter
4 Cups milk
1/2 Cup flour (I use whole wheat flour)
1/2 tsp salt
1/2 tsp pepper
1/2 tsp onion powder


Melt butter in large skillet, gradually add flour, cook 1 minute, wisk in milk and seasoning. When thickened, add tuna. Serve over broken toast.

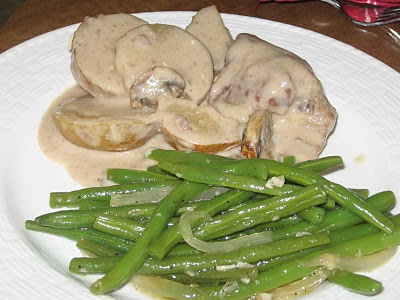
Garlic 'N' Onions Greenbeans


Ahhhhh.....Its that time of year for FRESH greenbeans. Can life really get ANY better than that?? I have been splitting Bountiful Baskets (a fresh farmers market program, google it for more info) with a friend and these delicious green beans were in there. This is one side dish I sometimes just forget about, so I'm posting it haha. Don't judge me :)
Garlic 'N' Onions Greenbeans


2 cloves garlic, minced
1/2 onion, sliced thinly
fresh greenbeans, washed and ends trimmed
Extra Virgin Olive Oil
Saute garlic and onions for a few minutes in hot EVOO. Add greenbeans and saute few minutes more. Add a tiny bit of water to the pan and place lid on top until the beans are the desired tenderness. The steam from the water will steam cook the rest of the greenbeans. Add salt, pepper and enjoy!

Sunday, June 20, 2010

Chinese Chicken Salad


This is one of my favorite meals as it can be eaten for lunch or dinner. The cabbage makes it filling and healthy. I can't think of another way I'd ever eat a huge head of cabbage, except in this recipe.....unless you are a coleslaw fan. Me, not so much haha. The marinaded chicken makes it really good, but if you are in a pinch, just boil and shred some chicken or leave it out altogether for a vegetarian dish. Usually my husband and I will make up a big batch of the marinaded chicken and I'll set a piece or two aside just for this dish that we'll shred later that week. The above picture doesn't do this salad justice. It really is super tasty, but beware-it kind of takes awhile to make this salad since everything has to be washed, chopped and prepared. Keep that in mind. :) Enjoy!

Chinese Chicken Salad

INGREDIENTS:

1 head cabbage (I usually add some chopped romaine also)
2 bunches green onions, or more to taste
shredded carrots
2 C cooked chicken breast (can marinade, see below)
3-4 tsp sesame seeds
1 small package almonds
2 packages Ramen Noodles
1 can mandarin oranges, drained

Dressing:
½ C oil
1 TBS sugar
3 TBS vinegar
½ tsp salt
¼ tsp pepper
seasoning packets from the Ramen Noodles

Chicken Marinade (aka Soy Sauce Chicken):
½ C sprite or 7-Up
1/8 C vegetable oil
¼ C soy sauce
¼ tsp garlic powder

DIRECTIONS:

1. Wash and chop cabbage, slice green onions and shred carrots. Place in big serving bowl.

2. Cook chicken by baking or barbequing if using the marinade. Marinade overnight for best results. If not using the marinade, boil chicken and salt it afterwards. Shred into small pieces with a fork. Add to bowl.

3. On a cookie sheet, roast almonds, sesame seeds and broken up Ramen Noodles in 400-degree oven until toasty and golden brown, usually just a few minutes. Watch them and/or set a timer so they don’t burn! Add to bowl just before serving to prevent sogginess.

Photo Source: here

Thursday, June 17, 2010

Lemon Pie


When I was in jr. high, my mom used to take me to this cute little cafe in Layton called, "The Pie Pantry." It was SO good. We would always get these yummy turkey and swiss sandwiches and for some reason I remember they had good pickles haha. We would always then get the lemon pie for dessert. This recipe is EXACTLY like theirs....to a T! The only thing is that mine didn't set up as good as theirs did, but it tasted just like it. Mom, I'm going to make this for you the next time you come to Nevada. Only thing, you have to use fresh lemon juice. Don't even attempt it if you are using bottled lemon juice. It would be an insult-seriously.

Lemon Pie

1 baked pie crust (I like Graham Cracker Crust)
3 eggs
1 1/2 C sugar
3 TBS flour
3 TBS cornstarch
2 TBS butter
1-2 tsp finely shredded lemon peel (I just grated the peel off the lemons I used)
1/3 C fresh lemon juice (MUST be fresh, 2 big lemons were just right)


1. Prepare baked pie crust and set aside. Separate egg yolks from whites; set whites aside to be used as meringue (meringue recipe not listed here because I'm not a big meringue fan) or you can set aside to be used for breakfast the next morning. :)


2. For filling, in a medium saucepan combine sugar, flour and cornstarch AND DASH SALT. Gradually stir in 1 1/2 C water. Cook and stir over medium-high heat until mixture is thickened and bubbly; reduce heat. Cook and stir for 2 minutes more. Remove from heat.


3. Slightly beat egg yolks with a fork. Gradually stir the yolks into the hot filling, mixing with a whisk constantly. Bring to a gently boil. Reduce heat, cook and stir 2 minutes more. Remove from heat.


4. Stir in butter and lemon peel. Gently stir in lemon juice. Pour warm filling into pie shell. Chill 3-6 hours before serving. Cover for longer storage.

Photo Source: Taste Of Home

Tuesday, June 15, 2010

Graham Cracker Crust


I know it might seem silly to put this on my cooking blog, but I have had to look up this recipe at least twice and.....I'm kind of tired doing that haha. So, here it is. Oh, and ignore the bigger chunks of graham crackers in the picture above. I should have pulsed them more. I even considered not putting a picture up because I was so embarrassed...and lazy. :) In the end, the picture won out. So, don't judge me haha. And besides, I'm pretty sure I'm about the only one who looks at this blog anyways ;)


Graham Cracker Crust


Ingredients:

1 1/2 C graham crackers (or 9 full crackers, 1 unopened package)

1/4 C sugar (I omit this because I think the crackers are sweet enough)

1/3 C butter, melted (or 5 1/2 TBS)


1. Pulse graham crackers in a food processor until they are fine crumbs. You can also put them into a plastic bag and use a rolling pin to crush them-but trust me-this takes forever, is messy and should be a last resort only. I would even put them into the blender first.


2. Melt butter and add sugar (if using) to graham cracker crumbs. Mix well.


3. Firmly press mixture into a 8" or 9" pie tin. Bake at 350 degrees for 7-8 minutes.

Photo Source: here

Saturday, June 12, 2010

Broccoli & Ham Quiche


My husband and I had this for dinner, but I quickly realized it was much more of a breakfast dish. I guess some people love breakfast foods for dinner, so I guess it could be satisfying for both. It could easily be made into a vegetarian dish by leaving out the meat as well. I served this with fresh fruit. Yum :)

Broccoli and Ham Quiche

3/4 c. chopped cooked ham
1 pkg. frozen chopped broccoli
1/2 c. chopped onion
1/2 c. chopped green pepper (I used red)
1 c. grated cheddar cheese
1 1/2 c. milk
3/4 c. Bisquick mix
3 eggs
1 tsp. salt
1/4 tsp. pepper

Heat oven to 400 degrees. Lightly grease quiche dish. Thaw broccoli (squeeze out water) and mix with ham, onion, pepper, and cheese. Spread in dish. Beat remaining ingredients and beat until smooth. Pour over other ingredients and bake until brown, about 35-40 minutes. Let stand 5 minutes before cutting.


Side Note: It took about an hour for this to cook, I think partly because I used a taller dish. It would do better in a shallow dish instead.


Source: Cooks.Com

Peach Passion Fruit Smoothie

I know this isn't the best picture, but hey, its better than nothin. As I've mentioned before, I'm having a hard time getting my one year old to eat solid fruits. I've found that smoothies are just the ticket. I've been having fun experimenting with different fruits. Seriously, Jamba...why aren't you paying me loads of dough to invent new recipes for you?? :)


Peach Passion Fruit Smoothie

1/4-1/2 C strawberry yogurt

1 C frozen peaches

1 banana

frozen or fresh raspberries and strawberries (I just threw in a big handful of each)

1/4-1/2 C milk

Blend away until smooth. Add as much milk as you'd like for desired consistency. :)

Tuesday, June 8, 2010

French Bread

My friend invited me over last week to teach me how to make this tasty French Bread. And trust me, its A-MA-ZING! The outside isn't really tough the way it is at the store. Ya know how it crumbles ALL over the floor and counter every time you cut into it? So frustrating to clean all those crumbs up. This crust is softer and the inside is so soft and fluffy. I'm not a huge fan of processed all-purpose flour, but in this recipe, it is really good. This recipe does take time...but its not hard. And, it makes 4 big loaves that Natalie says you can freeze and it tastes just as if you made it that day.


French Bread
Natalie Johnson


4 ½ Cups warm water

3 Tbsp Yeast

3 Tbsp sugar

3 Tbsp oil

1 ½ Tbsp salt

12 cups flour

Dissolve yeast and sugar in warm water. Add oil and salt. Then add half of the flour; mix and add remaining flour. Knead dough and let rest 10 minutes & punch down every 5 minutes for 20 min. Then Shape into loaves on a large greased cookie sheet. Slit the top of the loaf and let raise 10-20 minutes. Bake at 400 degrees for 25 minutes. (makes 4 large loaves)

Monday, June 7, 2010

Soy Sauce Chicken


This is the BEST chicken marinade recipe I have. I promise you, you'll love it. This was what my husband requested for his birthday dinner-its that good. As for the Sprite or 7-Up, my mother-in-law said she once substituted apple juice and it worked just as well. I'm not sure if I believe her.....because this chicken always comes out so tender. I wonder if the carbination has something to do with it??? Anyway, I always have a 12 pack of Sprite laying around just to use in this recipe. I'm not a soda fan, but for this recipe I make an exception. I also love this recipe because you can use this chicken in lots of dishes-I use it in my Chinese Chicken Salad recipe or throw it on a bun with melted swiss, sauteed peppers, onions and mushrooms and have chicken sandwiches.


Thaw chicken and marinade for 24-48 hours for best results. I prefer it cooked on the grill, but you can also bake it covered in the oven at 350 degrees for 30-45 minutes.


Chicken Marinade:
½ C sprite or 7-Up
1/8 C vegetable oil
¼ C soy sauce
¼ tsp garlic powder ( I usually put at least 1/2 tsp-1 tsp because I love garlic flavor)
1-2 LBS chicken ( prefer boneless skinless)

Saturday, June 5, 2010

Skor Cake


So, it was my husband's birthday recently and I asked him what kind of cake he wanted. After going through 3 different options, he finally settled on, "that cake thats chocolate with the toffee and its gooey." Well, my husband couldn't believe the real name of the cake......"Better Than Sex Cake." He didn't like that name because we don't want to have to explain to our son what sex is anytime soon, so I started teasing him calling it, "Better Than Jennifer Anniston Cake." It can also be found under, "Better Than Brad Pitt Cake," but lets face it, Brad Pitt just isn't what he used to be now that he is with Anjalina Jolie. Am I right people??? She just seems so weird to me. Anyway, my friend Natalie called it "Skor Cake" (even though I made it with Heath bars SHHHHHH). "Skor Cake" it is. And dang-its dangerous, delicious, and you won't be able to get enough of it. Well, actually-you will-because its pretty rich, but SO good. Enjoy!


Skor Cake
Ingredients:
1 German chocolate or other chocolate cake, baked, 13x9x2-inch
3/4 cup fudge topping (I used chocolate syrup)
3/4 cup caramel or butterscotch topping
3/4 cup sweetened condensed milk (I used one small can)
6 chocolate covered toffee bars, chopped

1/2 bag chopped toffee pieces, found in baking isle
1 small carton real whipping cream, whipped


Preparation:
Do not remove cake from pan. After the cake has cooled, make holes in the entire top of the cake using a large fork or the handle of a wooden spoon. Pour (one at a time) fudge, butterscotch, and condensed milk over the top of the cake and let each flavor soak in before adding the next. This takes a minute or two so be patient. Sprinkle half of the toffee pieces onto cake. Frost the cake with the whipped topping. Drizzle a little chocolate and butterscotch syrup on top to decorate. Then spread the remaining toffee pieces and chopped toffee bars to complete the decoration. Try to keep your hands off of this great cake before serving!
Serves 12


Original Source, Adapted by Mel

Wednesday, June 2, 2010

Berry Medley Fruit Smoothie


I've been having trouble getting my little guy to eat most fruits, but if I blend them up in a smoothie, he is all game! This smoothie was SO good. I highly reccomend it-like, HIGHLY. :) I should get a part time job at Jamba Juice for my mad smoothie skills. Try it, you'll see what I'm talkin about.
Berry Medley Fruit Smoothie
16 oz (1 lb) Frozen Berry Medley assortment (found in the freezer section at Walmart) OR fresh strawberries, blackberries, blueberries and red raspberries
1/4 C vanilla yogurt (I like the 'Mountain High' brand, no added processed sugars or corn syrup)
1/2 C milk (or however much it takes to make it the consistency you desire)
1/2 banana
Blend, blend away until smooth. Delicious.

Tuesday, June 1, 2010

Lemon Squares


Yes, they are delicious and I could eat a whole pan without blinking an eye. I LOVE lemon bars and this recipe is really good. So enjoy! Side note, I doubled the above recipe.

Lemon SquaresLoraine Warnick


*This recipe makes a 8x8 or 9X9 pan-double recipe for a 9X13 pan.
Crust:
1 C flour
½ C butter, softened
¼ C powdered sugar

Topping:
2 eggs
1 C sugar
½ tsp baking powder
¼ salt
2 tsp grated lemon peel
2-3TBS lemon juice (use fresh, its SOOO much better)
2 TBS flour

DIRECTIONS:

Crust:
1. Heat oven to 350 degrees.
2. Mix flour, butter and powdered sugar. Press in an ungreased square pan, 8X8 or 9X9, building up ½ inch edges.
3. Bake 15-20 minutes at 350 degrees.

Topping:
4. Beat remaining ingredients until light and fluffy, about 3 minutes.
5. Pour over hot crust.
6. Bake until no indentation remains when touched lightly in center, about 25 minutes. If this layer is not golden brown on top, its not done!
7. Cool, cut into 1 ½ inch squares. Dust with powdered sugar if desired.

Photo Source: here